The first homemade shampoo I ever poured straight from a mason jar in the shower ended up running down my arm and into the drain before any of it touched my hair. That’s how most beginner batches go. Too thin, too watery, and a strange waxy feeling at the ends. Making shampoo at home is genuinely simple once you understand a few principles, but pouring castile soap into water and shaking it isn’t a recipe; it’s a starting point.
A good homemade shampoo balances cleansing power, moisture, the right thickness, and a scalp-friendly pH. Get those right and you save money, cut down on packaging, and know exactly what’s touching your hair. Get them wrong and you end up with greasy strands, a tight scalp, or a bottle that turns cloudy in a week. This guide walks through ingredients, the step-by-step method, recipes for different hair types, and the small mistakes that ruin most first batches.
What Is Homemade Shampoo?
Homemade shampoo is a DIY hair cleanser you mix yourself using gentle cleansing agents, distilled water or herbal infusions, light oils, humectants, and optional thickeners or scents. Most recipes use a base of liquid castile soap, soap nuts, or a mild plant-based surfactant like decyl glucoside, then add aloe and a humectant such as vegetable glycerin for moisture.
One thing worth saying upfront: shampoo is built for your scalp, not the lengths of your hair. The scalp is where oil, dead skin, and product buildup actually live. The ends mostly need conditioning, not stripping. Once that clicks, formulating becomes much easier.
Is Homemade Shampoo the Same as Commercial Shampoo?
Not really. They both clean hair, but the formulation philosophy is completely different.

Commercial shampoo is engineered with multiple components working together:
- Surfactants (often sodium laureth sulfate or gentler alternatives like sodium cocoyl isethionate) for cleansing
- Stabilizers and emulsifiers to keep oil and water from separating
- Preservatives to prevent microbial growth
- Thickeners such as sodium chloride or polymers
- Fragrance and pH adjusters
- Conditioning agents like panthenol or silicones
Homemade shampoo is simpler. You’re usually working with three to six ingredients, no industrial preservative, and no machine to homogenize the mixture. That simplicity is the appeal, but it also means a shorter shelf life, a thinner texture, and lather that may not match what you’re used to from a drugstore bottle.
Basic Ingredients You Need to Make Shampoo
Before mixing anything, gather your building blocks. Each one plays a specific role.

Cleansing Base
This is what actually removes oil and dirt. Beginners do well with liquid castile soap like Dr. Bronner’s, which is plant-based and widely available. More advanced makers move to mild surfactants such as decyl glucoside, cocamidopropyl betaine, or sodium cocoyl isethionate, which are gentler on hair than soap and sit closer to the scalp’s natural pH. Soapnut infusion (made from Sapindus mukorossi berries) is another traditional option that produces a soft, natural lather thanks to its saponin content.
Water or Herbal Tea
Use distilled water as your liquid base. Tap water carries minerals that interfere with formulas and shorten shelf life. For an herbal upgrade, brew a strong tea using rosemary, chamomile, green tea, nettle, or calendula. Aloe water is another popular choice and adds a touch of moisture.
Moisturizing Ingredients
To stop your shampoo from leaving hair stripped, add humectants and a small dose of oil. Aloe vera gel, vegetable glycerin, and raw honey all draw moisture into the hair. A few drops of a lightweight oil like jojoba oil, argan oil, or sweet almond oil add slip without weighing hair down.
Thickening Ingredients
DIY shampoo tends to run watery. To fix that, you can use xanthan gum, guar gum, a teaspoon of salt (in surfactant-based recipes only), or a generous dose of aloe vera gel, which thickens naturally.
Optional Essential Oils
Lavender, rosemary, peppermint, tea tree, and chamomile essential oils add scent and small functional benefits. Keep amounts low. Five to ten drops per cup of shampoo is plenty. Anything more can irritate the scalp, especially for sensitive skin or eczema-prone users.
How to Make Shampoo Step by Step
Once your ingredients are ready, the actual process takes about ten minutes.

Step 1: Choose Your Shampoo Base
Pick a single base and stick with it for your first batch. Liquid castile soap is the easiest entry point. Don’t try to layer four cleansers together until you understand how each one behaves. Simple recipes work better when you’re learning.
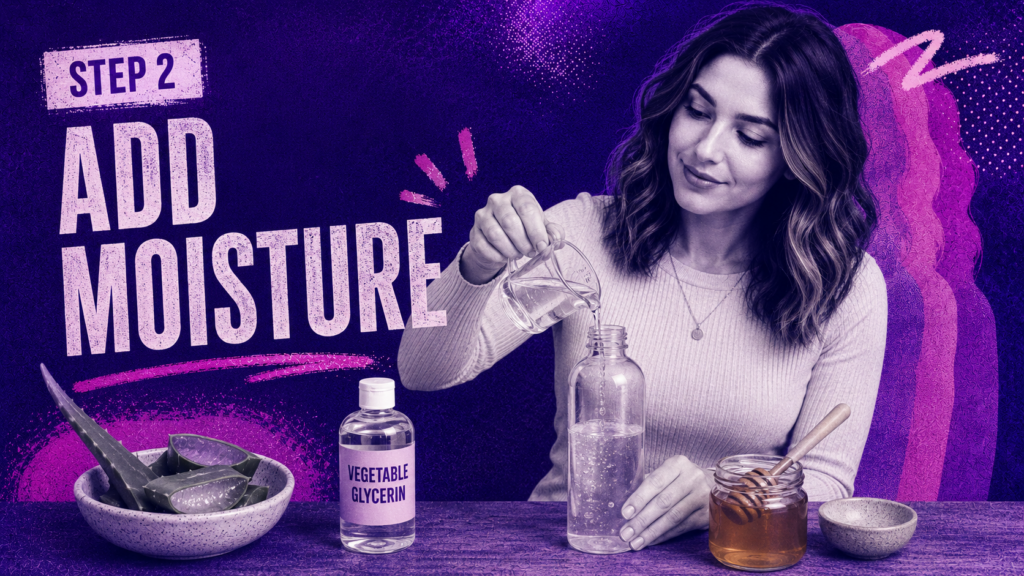
Step 2: Add Moisture
Pour in aloe vera gel, a teaspoon of glycerin, or a small spoon of honey. This counters the slightly stripping effect of soap and keeps hair from feeling like straw after rinsing.
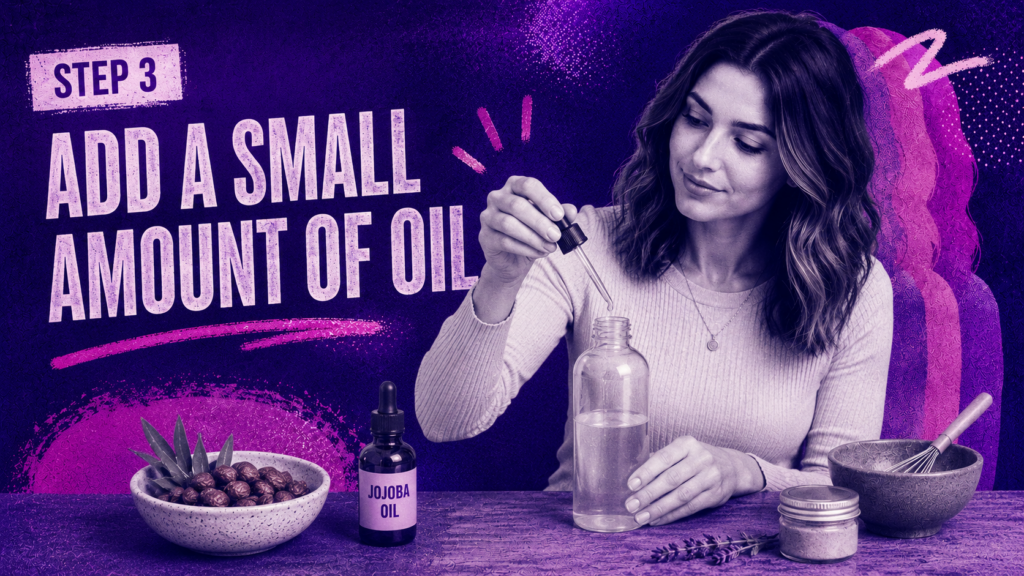
Step 3: Add a Small Amount of Oil
A few drops go a long way. Half a teaspoon of jojoba oil or argan oil is enough for a full bottle. Pour in too much and you’ll spend three rinses trying to get your hair clean. The first batch I ever made had a full tablespoon of olive oil in it, and it took two showers and a clarifying rinse to feel normal again.

Step 4: Add Scent Carefully
Skip this step entirely if you have a sensitive scalp, dandruff, or recent keratin treatments. If you do scent it, add 5 to 10 drops of essential oil and stir gently.

Step 5: Thicken the Shampoo
For a thicker pour, sprinkle a small amount (around 1/8 teaspoon) of xanthan gum or guar gum into the bottle and shake until it dissolves. Aloe gel works well too if you’d rather avoid gums.
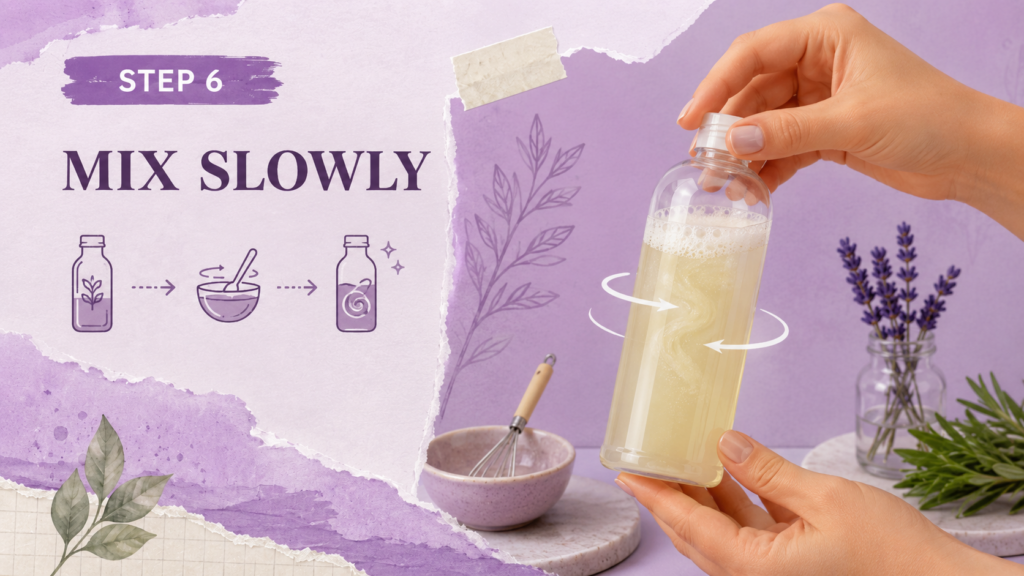
Step 6: Mix Slowly
Resist the urge to shake hard. Aggressive shaking traps air and turns the bottle into foam for hours. Gentle swirling is enough.

Step 7: Bottle and Label It
Use a clean, sterilized bottle (a squeeze bottle or pump dispenser works well). Write the date on the label and store it somewhere cool and dark. Small batches stay fresher than big ones.
Simple Homemade Shampoo Recipe for Beginners
There are two ways to start. One is dead simple, three ingredients only. The other is a slightly more complete formula that works for most hair types. Try the first if you want to see how easy this is. Move to the second once you’ve washed your hair a few times and want a bit more performance.
The 3-Ingredient Starter (Truly Simple)

Ingredients:
- ½ cup distilled water
- ½ cup liquid castile soap (unscented)
- 1 teaspoon vegetable glycerin
Method: Pour water into a clean bottle. Add castile soap. Add glycerin. Cap and gently invert a few times. Done. Use within 2 to 3 weeks.
That’s it. Nothing else needed. The water dilutes the soap so it doesn’t strip, the glycerin softens the result, and you get a gentle cleanser with five minutes of effort.
The 6-Ingredient Beginner Formula
When the simple version feels a bit drying, or you want a touch more body and scent, this is the next step up.

Ingredients:
- ½ cup distilled water or cooled rosemary tea
- ½ cup liquid castile soap (unscented)
- 1 tablespoon aloe vera gel
- 1 teaspoon vegetable glycerin
- ½ teaspoon jojoba oil (optional, skip if your hair is oily)
- 5 to 8 drops lavender or rosemary essential oil (optional)
Method: Pour the water into a clean bottle first, then add the castile soap. Stir slowly. Add aloe, glycerin, oil, and essential oil. Cap and gently invert the bottle a few times to combine. Label, date, and store in a cool spot. Use within two to three weeks.
How to Make Shampoo Thicker
A watery shampoo is the most common complaint with DIY formulas. Castile soap diluted with water naturally feels thin, and your hands will lose half the product before it reaches your scalp. The first dozen batches almost everyone makes have this exact problem.
A few ways to thicken homemade shampoo:

Use xanthan gum or guar gum. Both are natural thickeners used in commercial cosmetics. Mix a small pinch (about 1/8 to 1/4 teaspoon per cup) into your glycerin first to disperse it, then stir into the rest of the formula. Lumps usually mean you added the gum directly to water without dispersing it. That mistake is easy to make once and almost impossible to fix without straining the whole batch.
Add more aloe vera gel. Pure aloe gel naturally thickens shampoo and adds moisture at the same time. Replacing some of the water with aloe is the easiest fix for beginners.
Reduce your water content. If your formula is 50% water and 50% castile soap, try 40% water and 10% aloe. The whole bottle gets more viscous.
Try salt (only with surfactant bases). A pinch of sodium chloride thickens true surfactant systems like SLES or decyl glucoside, but it does not work with castile soap based formulas. Adding salt to castile soap actually breaks the formula. Worth knowing before you ruin a batch trying.
Use a foaming pump bottle. This is a sneaky trick. The pump pre-aerates a thin shampoo so it dispenses like a thick foam, which feels luxurious even if the liquid itself is runny.
How to Make Shampoo Lather More
Most people equate bubbles with cleanliness, but lather has very little to do with how clean your hair gets. Surfactants are what create suds. They lower the surface tension of water so air can mix in and form bubbles. Sulfates like sodium lauryl sulfate (SLS) are the most aggressive bubble-makers, which is why drugstore shampoos foam so dramatically.
Anyone switching from a sulfate-loaded shampoo to a homemade one notices the lather drop on day one. It’s a strange feeling, almost like the shampoo isn’t working. It is. You’re just unlearning years of conditioning that taught you bubbles equal clean.
If you want more lather from a homemade formula, here are realistic moves:
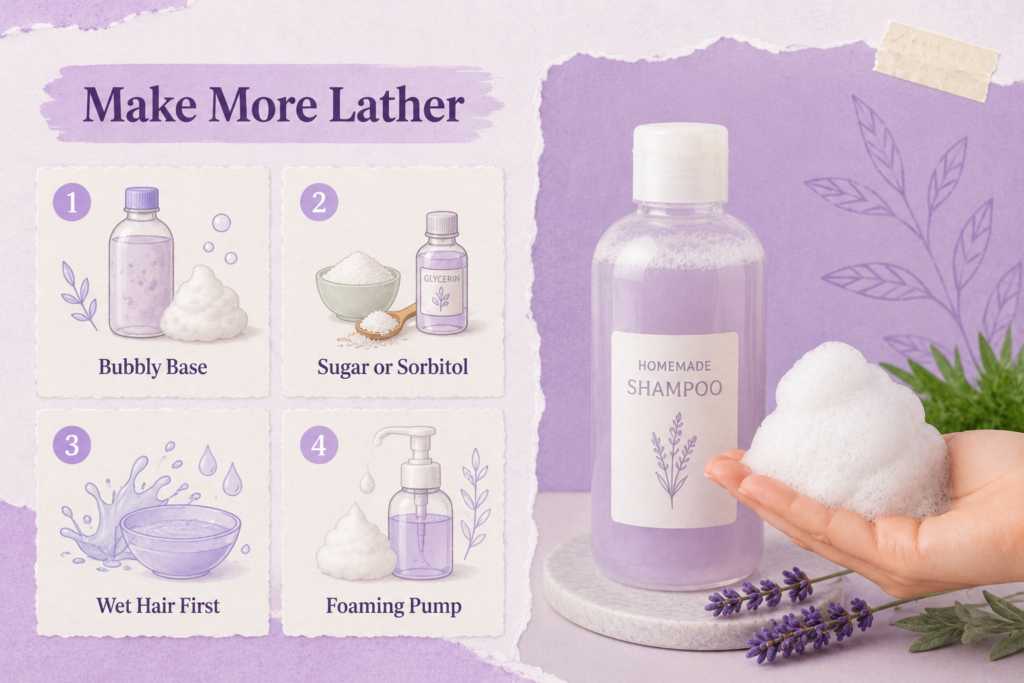
Use a bubblier base. Decyl glucoside and cocamidopropyl betaine lather more than castile soap. Soap nuts also produce a soft natural foam thanks to saponin.
Add a touch of sugar or sorbitol. Sugars increase the solubility of soap and stabilize bubbles. A small amount of vegetable glycerin helps too.
Wet hair thoroughly first. Soap reacts with water to form bubbles. If your hair is only damp, your shampoo will feel pasty. Drench your hair before applying, then dilute the product with a little extra water in your palm.
Use a foaming pump. Same trick as thickening. The pump introduces air and creates instant foam.
A note worth keeping in mind: a sulfate-free, soap-based shampoo will never bubble like a commercial one. That’s not a defect. It just means there are fewer foam-boosting detergents in the bottle.
How to Make Shampoo More Moisturizing
Dry hair, frizz, and a tight scalp after washing usually mean the shampoo is too cleansing. To dial up moisture without making hair greasy, focus on humectants and small amounts of slip.

Strong moisturizing additions include aloe vera gel, vegetable glycerin, panthenol (also called pro-vitamin B5), raw honey, and hydrolyzed proteins. These all attract and hold water inside the hair shaft.
For oils, stick with light, non-comedogenic options. Jojoba oil mimics natural sebum so it absorbs cleanly. Argan oil adds shine. Sweet almond oil softens. Keep total oil content under 1% of your bottle. Past that, your hair starts looking limp and unwashed.
Avoid the temptation to dump in coconut oil, heavy butters, or tablespoons of olive oil. They sound nourishing but separate from water-based shampoo and leave a film you can’t rinse out properly.
Homemade Shampoo Recipes for Different Hair Needs
One formula doesn’t work for every head. Here are seven targeted variations.

Simple Shampoo for Normal Hair
Stick with the beginner recipe above. Castile soap, distilled water, a teaspoon of glycerin, and a few drops of lavender oil cover most needs.
Moisturizing Shampoo for Dry Hair
Replace half the water with aloe vera gel. Add 1 teaspoon glycerin, 1 teaspoon honey, and ½ teaspoon argan oil or jojoba oil. Optional: a few drops of chamomile essential oil for softness.
Lightweight Shampoo for Oily Hair
Use green tea or rosemary tea instead of plain water. Skip the carrier oil entirely. Add a teaspoon of apple cider vinegar to balance the scalp microbiome and reduce excess oil production. Peppermint or tea tree essential oil works well here.
Gentle Shampoo for Sensitive Scalp
Skip all essential oils. Skip apple cider vinegar. Use unscented castile soap, distilled water, aloe vera gel, and calendula tea. Calendula is one of the most soothing herbs for irritated skin.
Anti-Dandruff Shampoo
Brew a strong tea with neem leaves and rosemary. Add 5 drops of tea tree essential oil and 1 teaspoon of apple cider vinegar to the formula. Tea tree has antifungal properties that target the yeast linked to flaking. Skip any heavy oils, since they make dandruff worse.
Color-Safe Shampoo for Treated Hair
Skip castile soap entirely for this one. Its high pH (around 9 to 10) lifts the cuticle and accelerates color fade. Use a mild surfactant like decyl glucoside instead, mixed with distilled water, aloe vera gel, and a small amount of vegetable glycerin. Add citric acid sparingly to bring the pH down to 4.5 to 5.5. This is the one variation worth investing in pH strips for.
Curly and Coily Hair Shampoo
Curly hair runs drier and needs much more slip. Replace half the water with coconut milk or full-fat aloe vera gel. Add 1 teaspoon honey, 1 teaspoon glycerin, and a few drops of argan oil. Skip surfactant-heavy formulas. The goal is to clean without stripping the natural oils that define your curl pattern.
Herbal Shampoo Option
Brew a strong infusion using rosemary, nettle, chamomile, and a pinch of dried lavender. Strain, cool, and use it as the water base. Rosemary is traditionally linked to scalp circulation. Nettle is rich in minerals. This version smells lovely and works well for general use.
Ingredients to Avoid in Homemade Shampoo
“Natural” doesn’t always mean safe. Plenty of common DIY ingredients cause more damage than the synthetic ones people are trying to avoid.

Baking soda. Sits at a pH of around 9, which is far too alkaline for hair. It strips the cuticle, fades color, and causes brittleness over time.
Undiluted essential oils. Tea tree, oregano, and peppermint can burn the scalp and trigger allergic reactions when used in high amounts. Five to ten drops per bottle is the upper limit. Adding 30 drops the way some Pinterest recipes suggest is a fast way to give yourself a chemical burn.
Lemon juice (used too often). Acidic enough to lighten and weaken hair if used regularly. Save it for occasional clarifying rinses, not daily washing.
Harsh detergents. Dish soap, shower gel, and laundry detergents are not formulated for hair. They strip oils brutally.
Heavy oils in large amounts. Coconut oil, olive oil, and shea butter sound nice but separate from water and leave hair greasy. Use only a few drops if you use them at all.
Food ingredients that spoil quickly. Fresh egg yolk, milk, mayonnaise, and avocado are popular in viral hair masks but turn rancid within hours. Don’t bottle them.
How Long Does Homemade Shampoo Last?
This is where most beginners run into trouble. A water-based homemade shampoo without a real preservative is an open invitation to mold, yeast, and bacteria. Some experts say microbial growth can begin within three days, often before you can see or smell it. The first time you forget a bottle in the back of a warm bathroom cabinet for a month, the lesson lands fast.
Realistic shelf-life guidance:
| Recipe Type | Shelf Life |
|---|---|
| Castile soap and distilled water mix (no fresh ingredients) | 1 to 2 months in a cool, dark cupboard |
| Recipes with fresh aloe vera, coconut milk, or herbal tea (no preservative) | 7 to 10 days, refrigerated |
| Properly preserved formulas (with cosmetic-grade broad-spectrum preservative) | Up to 6 months |
Make small batches. A 4 to 8 ounce bottle that you finish in two weeks is far safer than a giant jar that sits around for months. Toss any shampoo that smells off, looks cloudy, or changes color or texture.
How to Store Homemade Shampoo Safely
Storage is the difference between a shampoo that lasts and one that goes off in your shower.
A few simple habits:
Use a clean, sterilized bottle every time you mix a new batch. A pump or squeeze bottle is much safer than a jar because you never dip your fingers into the product. Store the bottle in a cool, dark place, away from steam and direct sunlight when not in use. Refrigerate any recipe with fresh coconut milk, aloe, or herbal tea. The fridge slows microbial growth significantly.
Discard the bottle if you notice color shifts, fizzing, separation that won’t remix, or any sour or musty smell. These are all signs of contamination.
Write the date you made it on the bottle. It’s easy to forget. A simple “Made: 12 May” on a label saves you from second-guessing two weeks later.
Can You Make Shampoo Without Chemicals?
Technically, no. Everything is made of chemicals, including distilled water, aloe, and plant oils. The phrase people usually mean is “without harsh synthetic detergents” or “with simpler, plant-based ingredients.”
If you’re trying to avoid certain ingredients, you can build a recipe without sulfates (SLS, SLES), parabens, silicones, or synthetic fragrance. A simple shampoo using liquid castile soap, distilled water, aloe vera, and a few drops of essential oil meets that goal.
For an even gentler approach, try soap nut decoction. Boil 10 to 15 dried Sapindus mukorossi berries in water for 20 minutes, strain, and use the liquid as a foamy, soap-free wash. It’s been used in South Asia for centuries.
Just keep expectations realistic. “Simpler ingredients” doesn’t mean longer shelf life or guaranteed scalp results. You’re trading industrial preservation for transparency, and that trade comes with limits.
Homemade Shampoo vs Store-Bought Shampoo
Both approaches work. Neither is automatically better. The honest comparison comes down to what you value.
The economic case is real. A 16-ounce batch of homemade shampoo costs roughly $0.50 to $1.00 in basic ingredients. A “natural” or salon-grade equivalent typically runs $8 to $15 for the same volume. Over a year of regular use, that gap easily clears $100. Hair care specialists also note that commercial shampoos go through controlled manufacturing and stability testing that DIY versions don’t, which matters for consistency and shelf life.

Pros of homemade shampoo:
- Full control over ingredients
- Customizable for your hair type and scalp condition
- Cheaper per batch (often under $1 to make 8 ounces)
- Reduced packaging waste
- No synthetic fragrance or sulfates if you choose to avoid them
Cons of homemade shampoo:
- Short shelf life without proper preservatives
- May not lather like commercial shampoo
- Can separate or thin out over time
- Doesn’t suit every scalp, especially color-treated or chemically processed hair
- Requires trial and error to get a recipe that works for you
Commercial shampoo wins on consistency, lather, shelf life, and lab-tested safety. Homemade wins on cost, transparency, and the satisfaction of knowing exactly what’s in your bottle. Many people split the difference by using a homemade clarifying wash once a week alongside a gentle store-bought daily shampoo.
Common Mistakes When Making Shampoo
Most first-batch problems trace back to a handful of repeat offenders. Watching enough beginner attempts, the same patterns surface again and again.
Adding too much oil, which leaves hair greasy and dull. Using baking soda as a regular cleanser, which damages the hair cuticle over time. Skipping pH considerations, which matters because hair sits naturally at around 4.5 to 5.5 and many DIY recipes drift toward 9 or higher. Making batches that are too large, which encourages spoilage. Expecting commercial-level foam from a soap-based recipe. Going heavy on essential oils, leading to scalp irritation. Forgetting to label and date the bottle. Using ingredients that have already gone off, especially fresh aloe or oils past their prime.
The fix for almost all of these is the same: start small, measure carefully, and write down what you used so you can adjust the next batch.
How to Use Homemade Shampoo Properly
Even a good formula falls flat if the application is wrong.
Wet your hair completely before adding shampoo. Hair fully drenched in water lathers and rinses better than damp hair. Pour a small amount (a tablespoon is usually enough) into your palm, dilute it with a splash of shower water, and rub your hands together to spread it.
Apply directly to the scalp, not the lengths. Massage in slow circles using your fingertips, not your nails, for about 60 seconds. The motion lifts oil and dead skin without scratching the scalp.
Rinse thoroughly. Homemade shampoo can leave a slight film if you stop rinsing too early. Keep going until the water runs completely clear.
Repeat only if needed. Most people don’t need a second round unless they’ve used a lot of styling product. Finish with a conditioner or a light apple cider vinegar rinse (1 tablespoon ACV to 1 cup water) on the lengths to smooth the cuticle, especially after a soap-based wash.
Should You Make Shampoo at Home?
It depends on your hair, your scalp, and how much trial and error you’re willing to invest.
Homemade shampoo suits you if:
- You enjoy DIY projects and are happy experimenting
- You prefer simple ingredient lists you can read
- You want to reduce packaging waste
- Your hair is not chemically treated and your scalp is healthy
Be careful or skip DIY if:
- You have scalp eczema, psoriasis, seborrheic dermatitis, or known allergies
- Your hair is color-treated, bleached, or recently keratin-treated
- You have very dry, damaged, or chemically processed hair
- You don’t have time to make small fresh batches regularly
Homemade shampoo can absolutely work for the right person. It just isn’t a one-size-fits-all replacement, and treating it like a science project rather than a magic fix gets you the best results.